Is It Safe to Replace Your LED Downlight Yourself? (Step-by-Step Video Guide)
What Is an LED Downlight and How Does It Work?
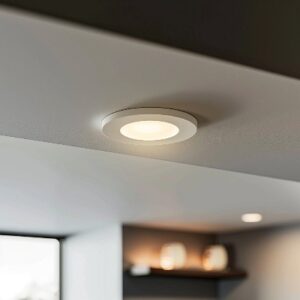
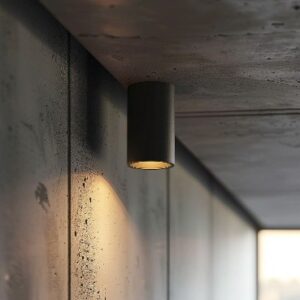
Types of LED Downlights (Recessed, Surface, Fire-Rated)
LED downlights come in different types, each suited for specific ceiling structures and installation methods. Understanding these options is essential when learning how to replace LED downlight correctly and safely.
Recessed LED Downlights
- Installed inside the ceiling for a clean, modern finish
- Ideal for plasterboard and suspended ceilings
- Commonly used in homes, offices, and commercial spaces
- Requires proper cut-out size and ceiling depth
Surface-Mounted LED Downlights
- Fixed directly onto the ceiling surface
- Perfect for concrete ceilings or where recessed installation is not possible
- Easier and faster to install compared to recessed lights
- Ideal for retrofit projects
Fire-Rated LED Downlights
- Designed to maintain the fire resistance of ceilings
- Helps prevent the spread of fire and heat between floors
- Required in many building regulations (especially in the UK)
- Essential for safe electrical installations
Common Reasons Downlights Fail:
LED downlights can fail due to several common issues related to wiring, components, or installation. Knowing these helps when learning how to replace LED downlight correctly.
- Faulty LED driver – stops the light from working or causes flickering
- Loose or incorrect wiring – interrupts power or creates faults
- Overheating – reduces lifespan due to poor ventilation or insulation
- Blown LED chip – causes dimming or complete failure
- Tripped circuit breaker – cuts power to the lighting circuit
- Voltage fluctuations – damages internal components over time
- Low-quality fittings – fail faster and are less reliable
Safety Precautions Before Replacing a Downlight
Turning Off Power at the Consumer Unit
Always switch off the power at the consumer unit (fuse box) before removing or installing a downlight. This isolates the lighting circuit and prevents electric shock. After turning off the breaker, use a voltage tester to confirm there is no live current before touching any wires.
Tools You Need for Safe Installation
Using the correct tools helps ensure safe wiring and a proper installation. Essential tools include an insulated screwdriver, voltage tester, wire stripper, and suitable connectors. These tools reduce the risk of incorrect connections and improve overall electrical safety during the replacement process.
If you ever find yourself unsure or needing a helping hand, it’s good to know that SMR Group delivers professional, high-quality electrical services right across London. Whether it’s an urgent issue or you simply want the job done properly, their experienced team is always ready to step in.
So, if you’re thinking “I need a reliable electrician near me right now,” you’re covered. Put the kettle on, relax, and let the experts take care of it.
If you’re located in areas such as
Chiswick,
Ealing,
Hampstead,
Hammersmith & Fulham,
Holland Park,
Kensington & Chelsea,
Knightsbridge,
Kew,
Kingston upon Thames,
Mayfair,
Putney,
Richmond,
Sutton,
Twickenham, or
Wimbledon Village, you can contact SMR GROUP on 07789 484208.
They offer a fast 24/7 emergency response, competitive pricing, and fully qualified local electricians who can reach you quickly when it matters most.
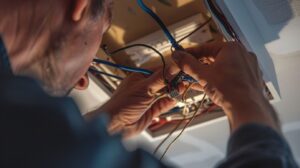
How to Remove an Old LED Downlight
Removing an existing fitting is the first practical step when learning how to replace LED downlight. This process must be done carefully to avoid damaging the wiring or creating electrical hazards.
-
Disconnecting the Wiring Safely
Once the power is turned off, gently pull the downlight from the ceiling and locate the connector or terminal block. Carefully loosen the connections and disconnect the wires one by one. Always ensure there is no live current before handling any cables to maintain proper electrical safety.
-
Identifying Live, Neutral, and Earth Wires
Before installing a new fitting, it is important to correctly identify the live, neutral, and earth wiring. In most cases:
- Live wire (brown) carries the current
- Neutral wire (blue) completes the circuit
- Earth wire (green/yellow) provides safety protection
Understanding live neutral earth wiring helps prevent incorrect connections and ensures a safe LED downlight replacement.
How to Install a New LED Downlight (Step-by-Step)
Installing a new fitting is the final and most important stage when learning how to replace LED downlight. Following the correct steps ensures safe wiring, proper operation, and long-lasting performance.
🔌Connecting the Wiring Correctly
Start by connecting the wires to the new LED downlight or its connector. Match each wire correctly:
- Live (brown) → Live terminal
- Neutral (blue) → Neutral terminal
- Earth (green/yellow) → Earth terminal
Make sure all connections are tight and secure to ensure safe and reliable electrical wiring. Incorrect connections can lead to faults or circuit issues.
🛠️ Securing the Downlight into the Ceiling
Carefully push the wiring back into the ceiling cavity and position the downlight into the cut-out. Most LED downlights use spring clips to hold the fitting in place. Ensure the light sits flush with the ceiling and is firmly secured.
⚡ Testing the Installation
Once installed, restore power at the consumer unit and switch on the light. Check that the downlight turns on correctly without flickering or delays. Proper testing confirms that the LED downlight installation has been completed safely and successfully.
In this step-by-step video, we show a real LED downlight replacement completed at a house in Chiswick, London. Below is a detailed explanation of the installation process:
Video Transcript:
In this video, we show you exactly how to replace LED downlight safely and correctly. Start by turning off the power at the consumer unit to avoid any electrical risk. Once the power is off, carefully pull the downlight out of the ceiling and disconnect the wiring. Identify the live, neutral, and earth wires before connecting your new LED downlight to the correct terminals. After securing the connections, push the fitting back into the ceiling until it sits flush. Finally, restore power and test the light to ensure everything is working properly. If you’re unsure at any point, it’s always best to consult a qualified electrician for safety.
If you’re based in:
- Chiswick
- Ealing
- Hampstead
- Hammersmith & Fulham
- Holland Park
- Kensington & Chelsea
- Knightsbridge
- Kew
- Kingston upon Thames
- Mayfair
- Putney
- Richmond
- Sutton
- Twickenham
- Wimbledon Village
, you can call SMR GROUP on 07789484208 for a fast, reliable 24-hour emergency electrician. We offer immediate response, competitive pricing, and fully qualified local electricians who can reach you quickly.
Common Mistakes When Replacing LED Downlights
When learning how to replace LED downlight, avoiding common mistakes is just as important as following the correct steps. These errors can lead to faulty operation, safety risks, or damage to your electrical system.
⚡ Incorrect Wiring Connections
- Mixing up live, neutral, and earth wires
- Loose or poorly secured terminals
- Can cause flickering, failure, or short circuits
🔌 Overloading the Circuit
- Installing too many downlights on one circuit
- Exceeding the circuit’s load capacity
- May trip the breaker or cause overheating
🧯 Poor Insulation or Loose Connections
- Exposed wires increasing risk of electrical faults
- Loose connections leading to intermittent issues
- Improper insulation causing overheating or fire hazards
Troubleshooting LED Downlight Problems
Even after installation, issues can occur. Knowing how to diagnose common problems is essential when learning how to replace LED downlight and ensure everything works correctly.
💡 Downlight Not Turning On
- Check if the power is switched on at the consumer unit
- Inspect wiring connections (live, neutral, earth)
- Test the LED driver or replace the fitting if faulty
⚡ Flickering LED Lights
- Loose wiring or poor connections
- Faulty LED driver or incompatible dimmer switch
- Voltage fluctuations in the circuit
🔌 Tripping Circuit Breaker Issues
- Short circuit caused by incorrect wiring
- Overloaded lighting circuit
- Damaged cables or faulty downlight
Cost to Replace LED Downlights in the UK (London Guide)
The cost of replacing an LED downlight depends on several factors, including the type of fitting, accessibility, and whether any wiring issues are present.
🔧 Typical Cost Breakdown
- Basic LED downlight replacement: £40 – £80 per light
- Premium or fire-rated downlights: £60 – £120 per light
- Labour (electrician hourly rate in London): £70 – £120 per hour
- Call-out fee (if applicable): £50 – £100
🏠 Example Cost in London
For a typical job replacing 4 LED downlights in a standard ceiling:
👉 Estimated total cost: £180 – £400
This includes labour and standard fittings, assuming no additional electrical faults are found.
⚠️ What Can Increase the Cost?
The price may be higher if:
- Wiring needs repairing or upgrading
- The ceiling is difficult to access
- Downlights need repositioning
- Fire-rated or IP-rated fittings are required (e.g. bathrooms)
- There are issues like tripping circuits or faulty connections
In these cases, additional electrical fault finding may be required.
💡 Can You Replace LED Downlights Yourself?
While simple replacements may seem straightforward, costs can increase significantly if mistakes are made.
Incorrect installation can lead to:
- Electrical faults
- RCD tripping
- Damage to fittings
- Safety risks
📞 Professional Installation vs DIY
Hiring a qualified electrician ensures:
- Safe installation
- Compliance with UK electrical regulations
- Proper testing of the circuit
👉 If you’re unsure, it’s always safer to use a professional electrician in London.
Final Tips for Safe and Efficient Downlight Installation
To successfully complete your project, it’s important to follow best practices for safety and performance. These final tips will help ensure a smooth process when learning how to replace LED downlight.
- Always isolate power before starting
Turn off the circuit at the consumer unit and confirm with a voltage tester - Double-check wiring connections
Ensure live, neutral, and earth wires are correctly connected and secure - Choose the right downlight type
Use recessed, surface-mounted, or fire-rated downlights depending on your ceiling - Avoid overloading the circuit
Make sure the total load is within safe limits - Use quality fittings and components
Reliable LED downlights last longer and reduce the risk of faults - Test the installation properly
Turn the power back on and check for flickering or issues
FAQs About LED Downlight Replacement
- Can I replace LED downlights myself?
- Do I need an electrician to change a downlight?
- Why is my LED downlight flickering?
- What size downlight do I need?
